
More inktober
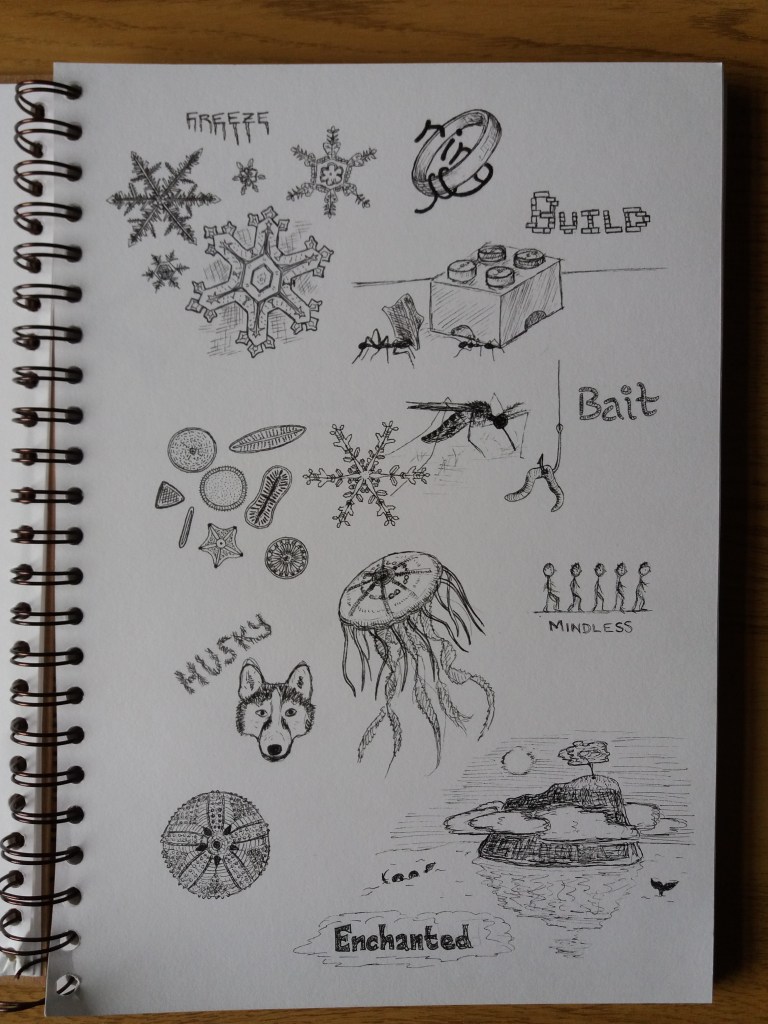
I read in the OCA newsletter about Inktober. There are a list of 31 words and each day you make a pen drawing to represent the word for that day. Here are my first seven words … I got a little carried away and drifted into drawings of diatoms, jelly fish and echinoids. This has been a really fun exercise for me and it’s getting me in the habit of spending a few minutes sketching everyday.
In this exercise I will create a mock up for the cover of a book called ‘The Summer Book‘ by Tove Jansson. This is a book that I enjoyed reading recently. The book is evocative of summer, there are two main characters – a grandmother and grandchild, and most of the book is set on a small Finnish island. The blurb on the back of the book is as follows:
An elderly artist and her six-year-old granddaughter while away a summer together on a tiny island in the gulf of Finland. Gradually, the two learn to adjust to each other’s fears, whims and yearnings for independence, and a fierce yet understated love emerges – one that encompasses not only the summer inhabitants but the island itself, with its mossy rocks, windswept firs and unpredictable seas.
Full of brusque humour and wisdom, The Summer Book is a profoundly life-affirming story. Tove Jansson captured much of her own experience and spirit in the book, which was her favourite of the novels she wrote for adults. This new edition sees the return of a European literary gem – fresh, authentic and deeply humane.
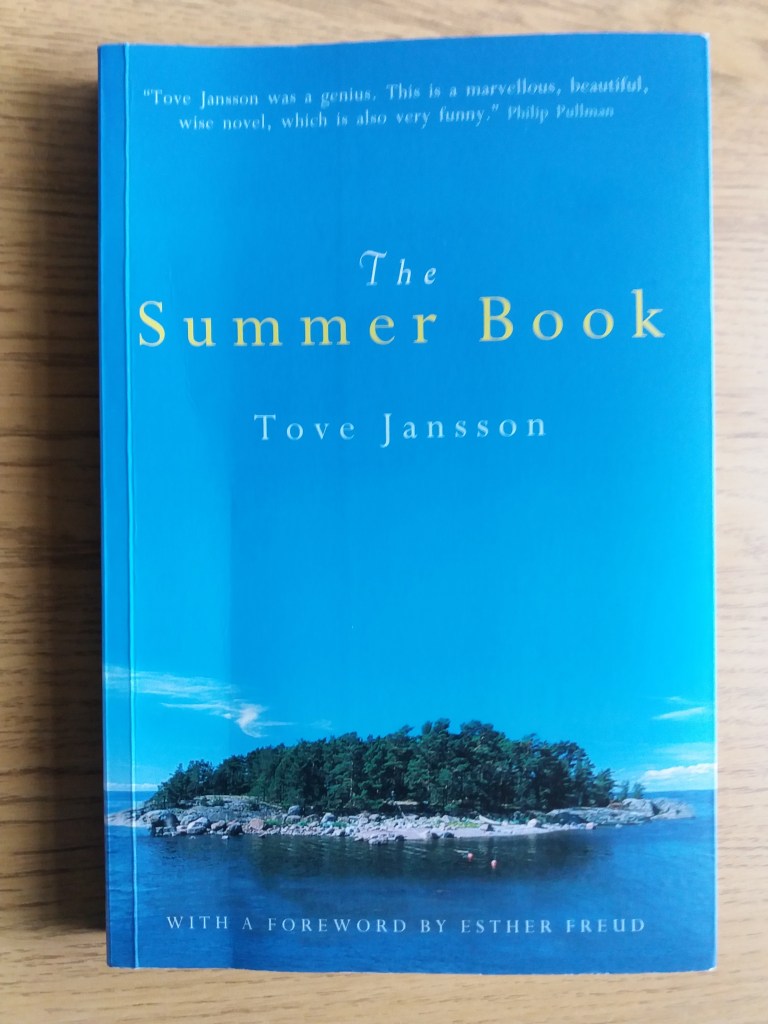
The book cover on the edition that I own is very simple; it comprises a simple photograph of the island on which the book is set.
If I were writing a brief for this existing cover, it would go along the lines: The illustration will be on the front cover of a new edition of ‘The Summer Book’ by Tove Jansson. The cover should include the text: ‘The Summer Book’, ‘Tove Jansson’, ”Tove Jansson was a genius. This is a marvellous, beautiful, wise novel, which is also very funny’ Philip Pullman’ and ‘with a foreward by Esther Freud’. The target audience is adults. The illustration should capture something of the tranquility and calm of the book. There are no restrictions of colour use.
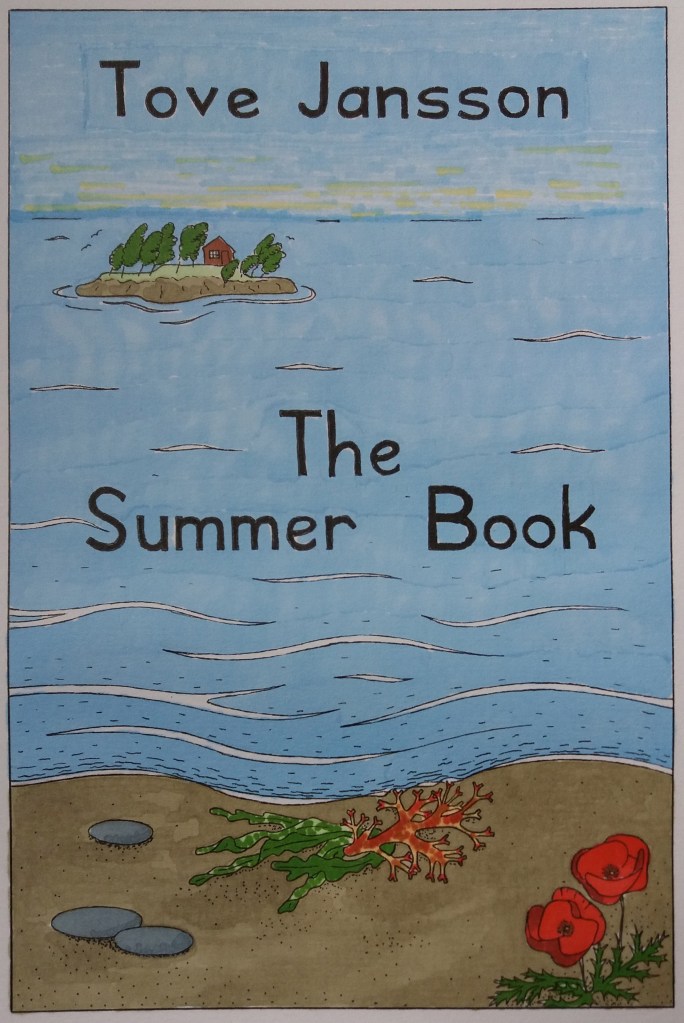
For my own illustration I want to modify this brief slightly. I am going to limit the text on the front cover to the book title and author. I want to include the book’s main caracters – the island, the grand mother, the granddaughter. I also want to communicate something of the essence of the book – summertime with gentle adventures.
I began by brainstorming in words and pictures what I remember of the book from when I read it a couple of months ago.
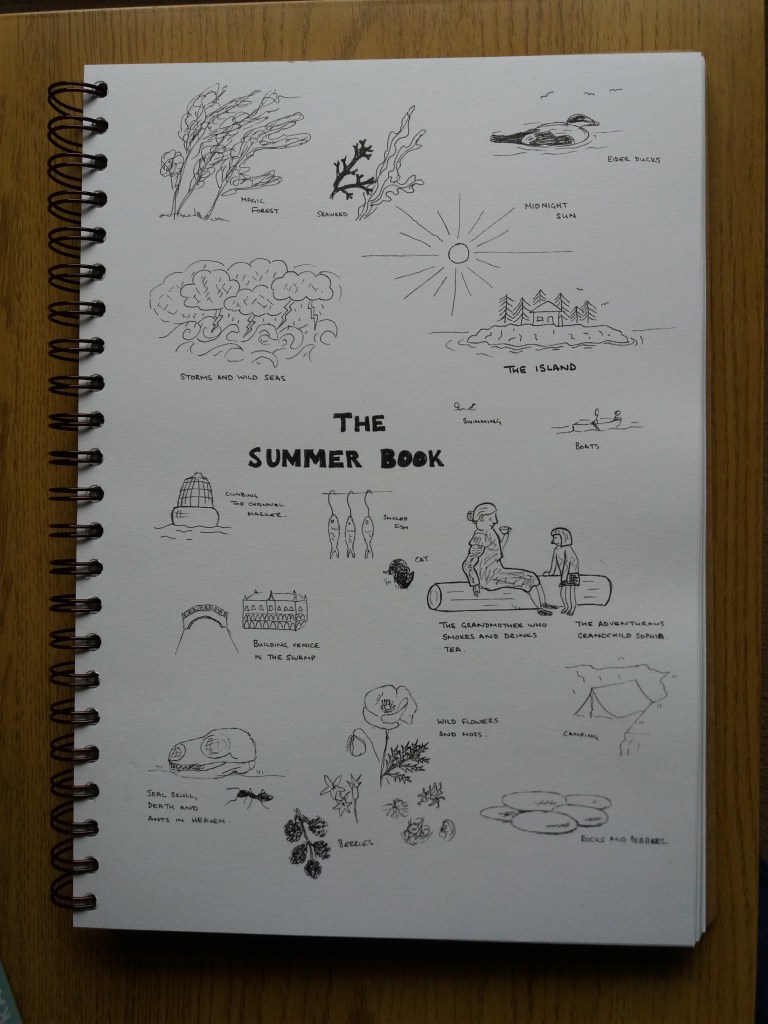
I found it easy to brainstorm images from my memories of reading the book. I noticed that a lot of my memories were about a sense of place – rocks, flowers and seaweed, rather than about the stories in the book. A thought that came to me while brainstorming is that each chapter in this book is a different story, so you could have lots of small images on the cover hinting at some of these stories. I was reminded of the original dustcovers of Arthur Ransome books. Alternatively, I might have a single image trying to give a sense of the characters and place. I think the rough, fluid style of these initial sketchs might work well on the book cover, although a book cover needs to be appealing from a distance, and this might work better with a simpler bolder imager.

My next step is to start thinking about colour and composition. I think that the original cover demonstrates that blues are important for sea and sky. Also greens are important for plants and sea. Then there are the greys of rocks and clouds.
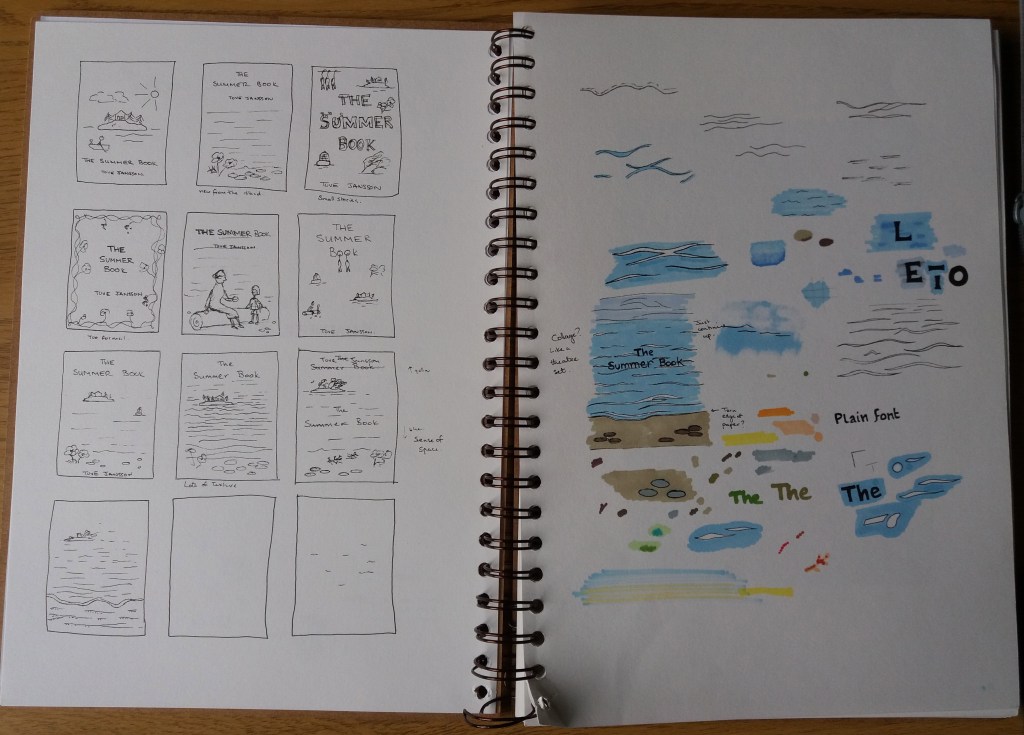
I experimented with a range of designs for the book cover. I decided that having a single image of the landscape, with some detail in the foreground reflected the sense of place that runs through the book. I considered using collage for the design to give a slightly whimsical, theatre set-type design, however, I was a bit limited on time and so instead used promarkers. Unfortunately whilst making the final design the main marker that I was using began to run out. This is why the colour is in clean blocks towards the base of the image and gets increasingly ‘liney’ towards the top. The yellow streaks are an attempt to mask this a little.

I think that this design gives both a sense of the place in which the book is set. I think that the detail in the foreground also reflects the book. The two main characters spend quite a bit of time focussed on details such as objects that have washed up on the beach. I am a little disappointed with the finish of the cover. Retrospectively, I realise that I haven’t met my own brief as I had intended to include images of the characters within the book cover.
The aim of this exercise is to understand how to create clear visuals that break an image down into its most important, structural elements. I chose two book cover illustrations and tried to break them down into their fundamental structural elements.

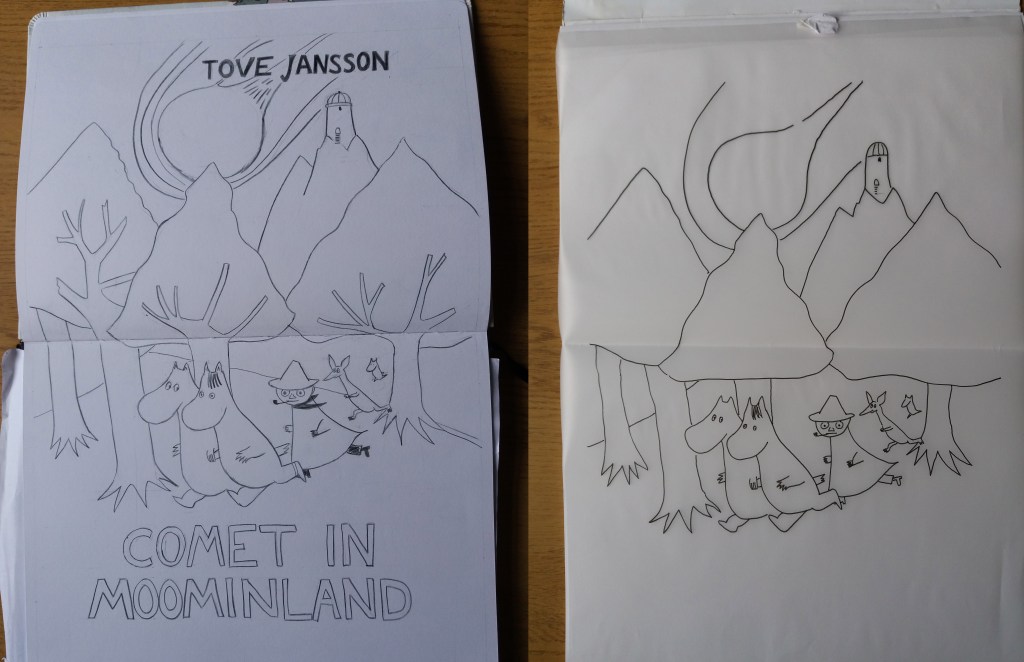
I think that some of the detail in the first image isn’t necessary – for example the tree branches. However, I think that the second image loses some of the movement of the image by oversimplifying the comet, which is a key element in the image. In the first image I used black pencil crayon for the lines, however, in all subsequent images I used a thick fine liner, which was easier to work with and produced cleaner lines.
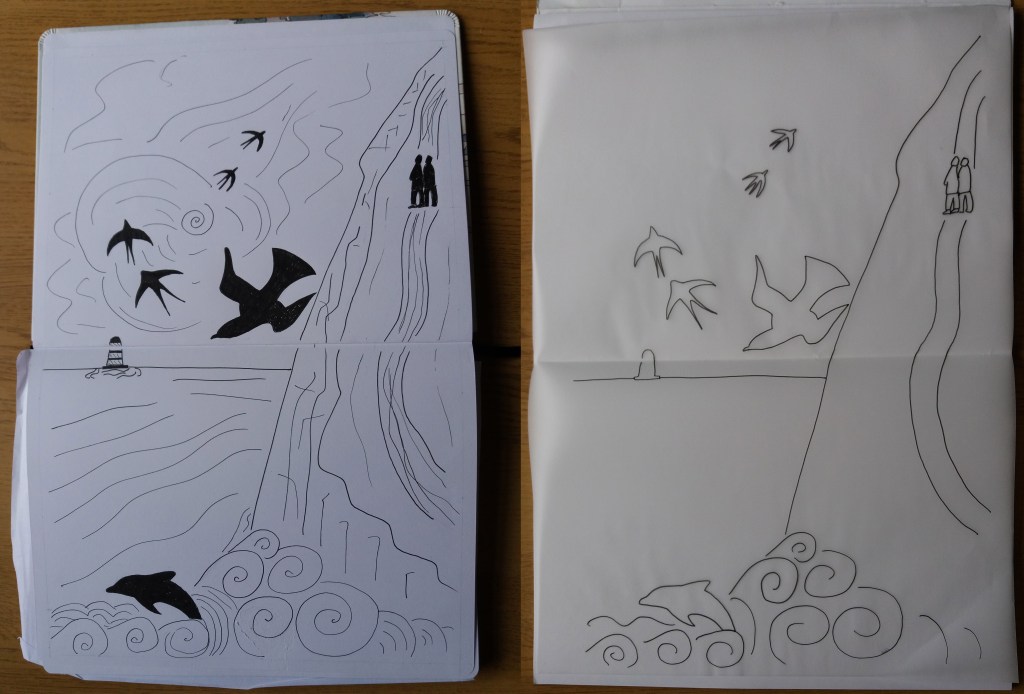
I really like the linework in the Salt Path book cover. I don’t think the very simplified image on the right works very well. The silhouetted birds, dolphin and figures somehow give the first image depth. A key element of the final illustration is the detailed linework, therefore it makes sense to show some of this in a visual aimed at clients.
I this exercise I collected some objects that shared the theme of summertime. I then took photographs of them looking at them from different perspectives.
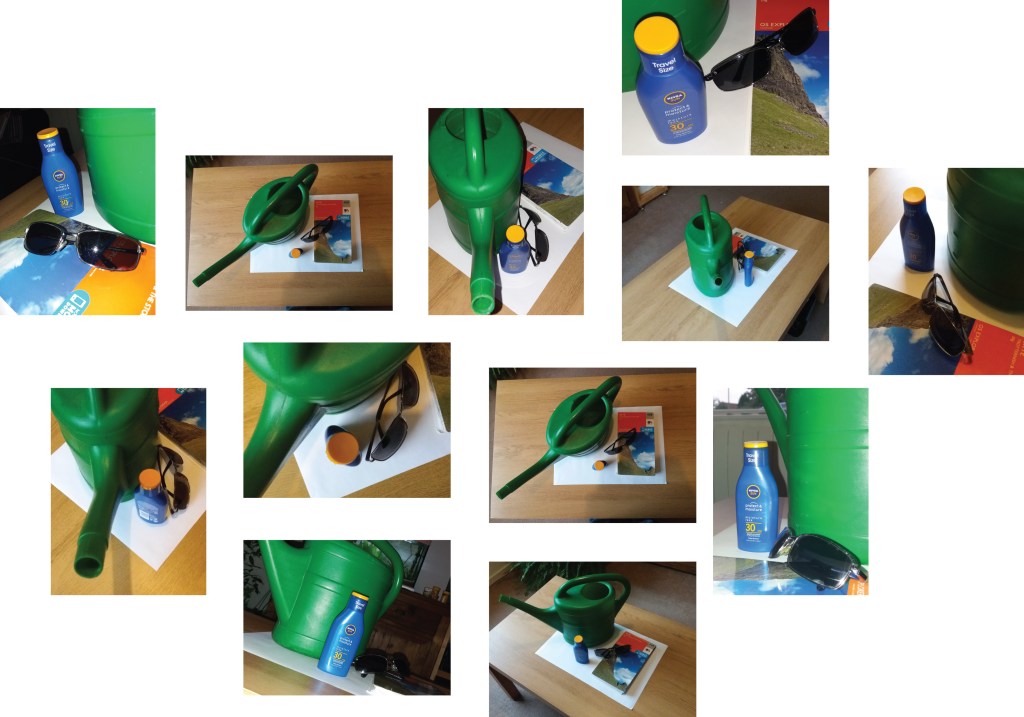
I then comleted a similar task by drawing, rather than photographing the objects. This gave a bit more freedom in terms of the shape of the ‘viewfinder’.
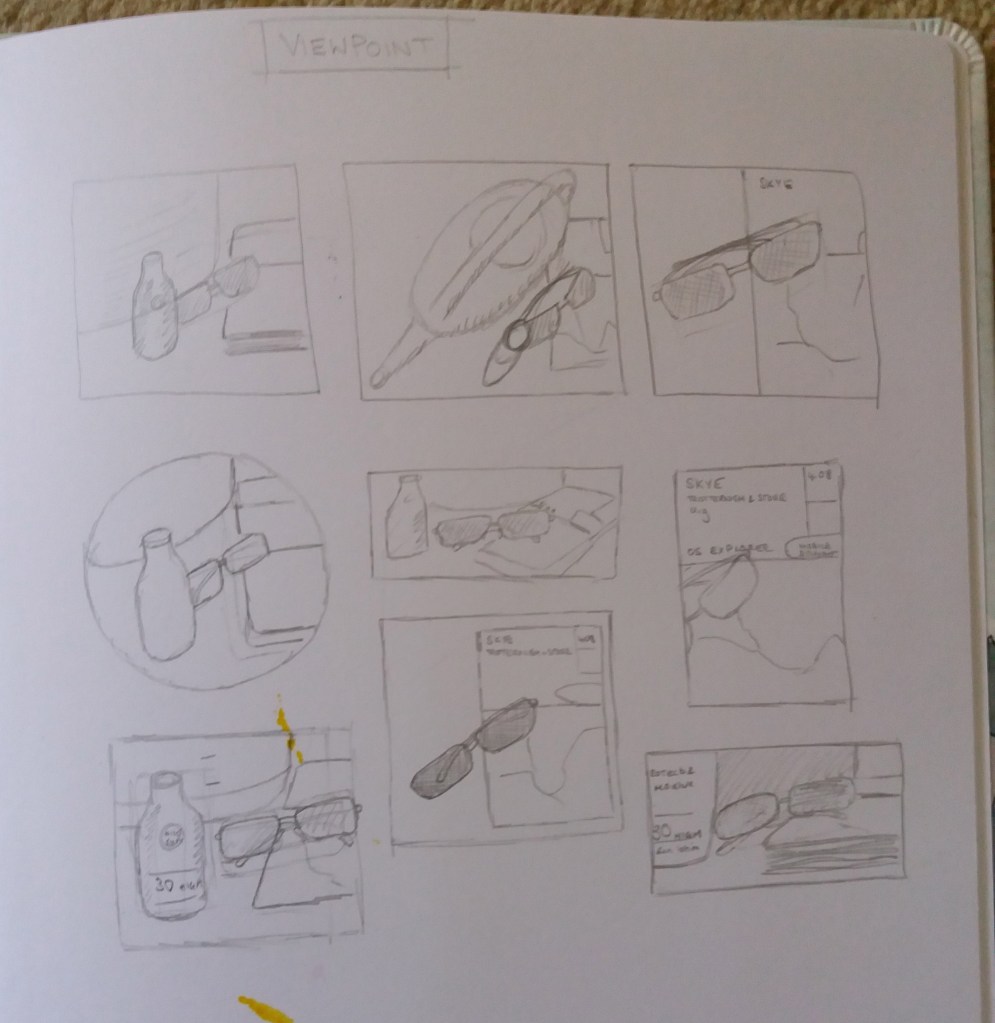
In general I found the photographs and drawings that focussed in on one or two of the objects more engaging to look at. The process of photographing and drawing the images also made me think about which objects best represented summer – for me the sunglasses and suncream. I therefore chose to further develop an image that focussed on these two items.
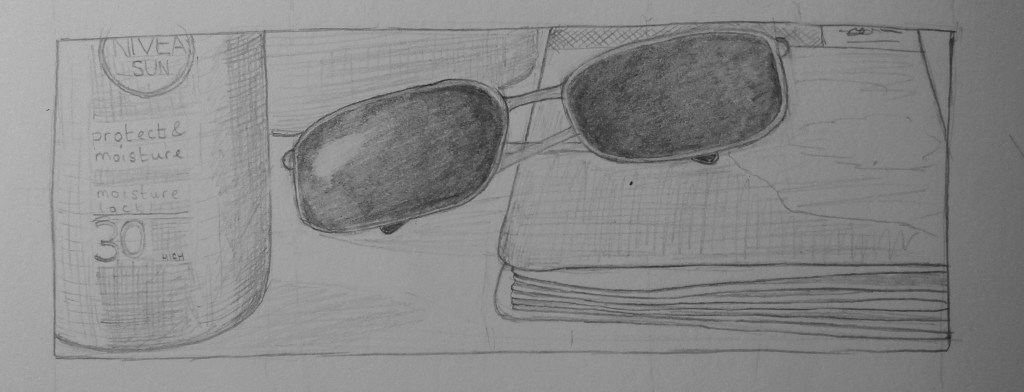
I think that the image works reasonably in representing summer. My eye is first drawn to the bottle of suncream in the foreground and then the sunglasses. I’m not sure that it is entirely obvious that there is a map underlying the sunglasses.
I found this a useful excercise for exploring different possible viewpoints,and shapes of viewfinders, before focussing in on a final design.
The aim of this exercise is to produce a visual set of instructions for making a cup of tea. I began by collecting examples of tea making instructions and relevant images.
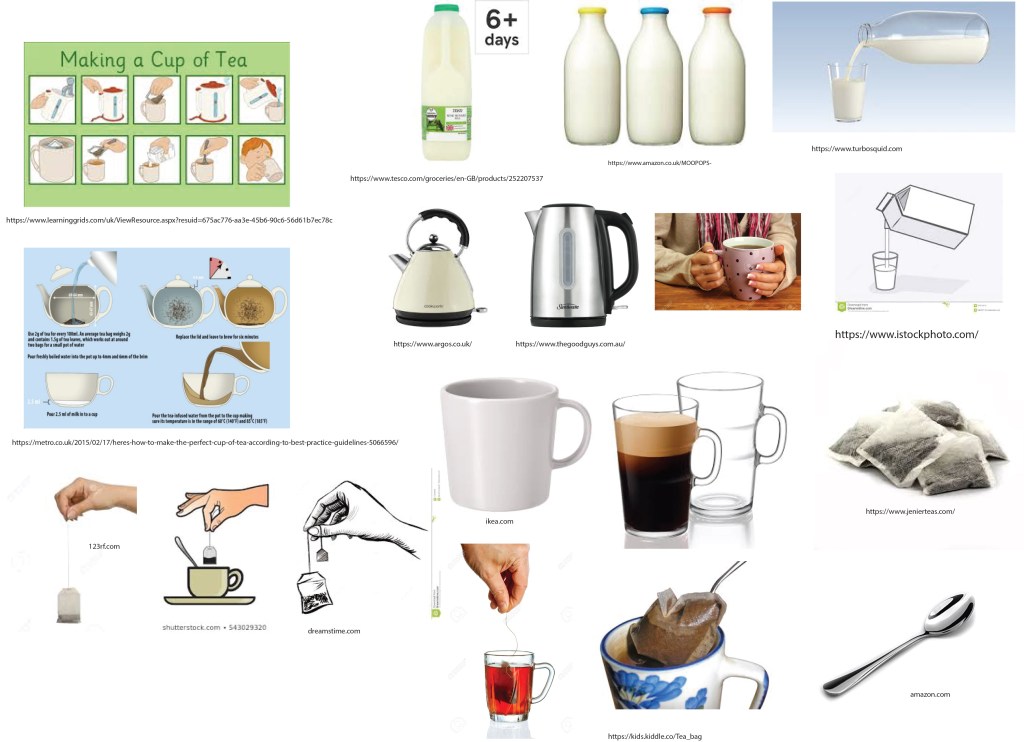
My reference material includes two sets of visual instructions for making a cup of tea. The top image provides a very clear set of instructions without using words; however, the layout is a little plain. It does also miss out some information such as how long the tea should be brewed for. The bottom image is very specific – including appropriate dimensions for the tea pot! This image requires a lot of reading to absorb all of the information.
Based on my research, how to make the perfect cup of tea is a somewhat controversial topic! To avoid all of this controversy, for the purposes of this exercise I decided to illustrate how I typically make a cup of tea. I began by thinking about how many steps need to be illustrated in order to instruct somebody how to make a cup of tea. I then started making sketches of the different objects that are used in the tea making process.
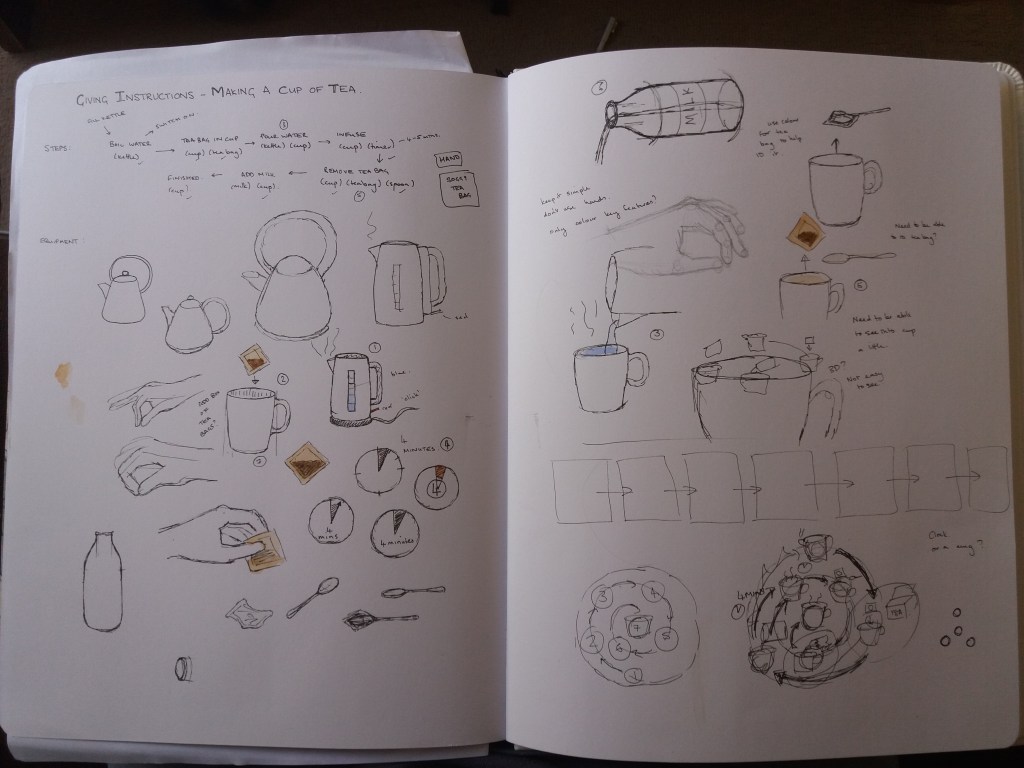
This process made me think about how to make objects easily recognisable. For example, kettles come in all sorts of shapes and sizes, as do bottles and boxes of milk. In order to maximise the accessibility of my illustrated instructions I chose what I think are the most recognisable forms of these objects. I also decided that I should include a few key words in the image e.g. a box of tea bags including the word ‘tea’, a label on the ‘milk’ bottle and the words ‘4 minutes’ alongside the timer. These words increase the clartity of the instructions without cluttering it with text. I also began to think about the use of colour. For now I have only coloured key elements within the drawings e.g. the switch on the ketlles, the tea bag etc. However, I am wondering if this might lead to quite a boring looking diagram. An alternative may be to lightly colour all of the objects but have key parts of those objects e.g. the switch on the kettle in bold colours.
I began to think about the layout of the instructions. I didn’t particularly want to have a linear set of panels as this is quite boring. I quite quickly liked the idea of the panels spiralling to a central cup of tea – the end point of the instructions. This shape is reminiscent of a clock (‘time for tea’) or looking down on a cup of tea. I thought about making the image 3D with the steps sitting on top of a cup but decided that it would be difficult to clearly illustrate the steps if I did this. The focus might also end up on the tea cup rather than the instructions.

In the end I decided to use colour throughout in order to make the illustration visually attractive. I’m not particularly satisfied with the end result. I think that the layout is a little confusing to follow. There are also endless red cups of tea such that the final cup, in the middle of the diagram, does not stand out.I considered giving the middle cup a coloured background, to help it stand out, however, I think this could make the image even busier. If I were to redesign this, I might have a much larger cup of tea in the middle. I might also have make the image larger and have more white space between the different elements of the image. I might also put a boundary around each diagram and have a more geometric/ formal layout for the positions of the image representing each step in the process.
It was also challenging to use watercolour on this paper. The water was ripping up the surface of the paper. I’m enjoying working with paint, however, I’m sort of making it up as I go along in terms of technique, which in some cases is more succesful than others.
In the first part of this exercise I listened to Beethoven, senata number 15 in C sharp minor and tried to create marks that I thought conveyed the essence or mood of the piece. I found this exercise frustrating. What I created on the page looked like a mess that in no way represented the music. I started again and tried to illustrate something that for me gave a feeling of the music. I had forgotten from my childhood that I dislike this type of piano music – I find it horrible and frustrating to listen to.

In terms of an adjective that describes the tone of the piece – I think that I would choose ‘irritating’. I think that the central part of my image best illustrates the word ‘irritating’ – where the cloudy grey meets solid lines. I chose to develop the image sticking with the same media – 5B pencil.
I think that the final piece is interesting. I don’t think that it is suitable for a CD cover – at least not if you want to sell any copies of the CD. I think that the final piece lacks the energy and emotion of the earlier markmaking, it’s become too stylised.
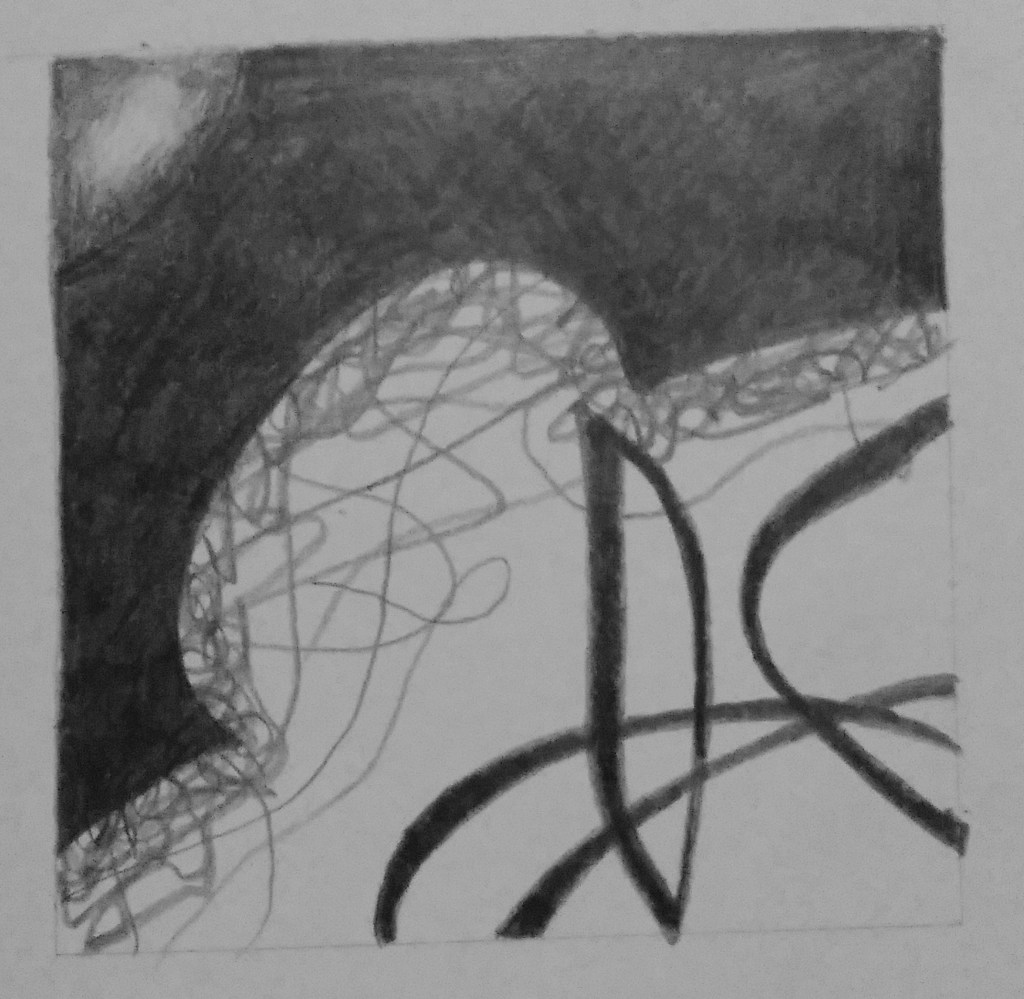
This exercise involves taking an existing image that has a range of content and then using blank L-shapes to crop the image. Then analysing the impact that cropping has on the focus of the image and choosing a word to represent each new image.
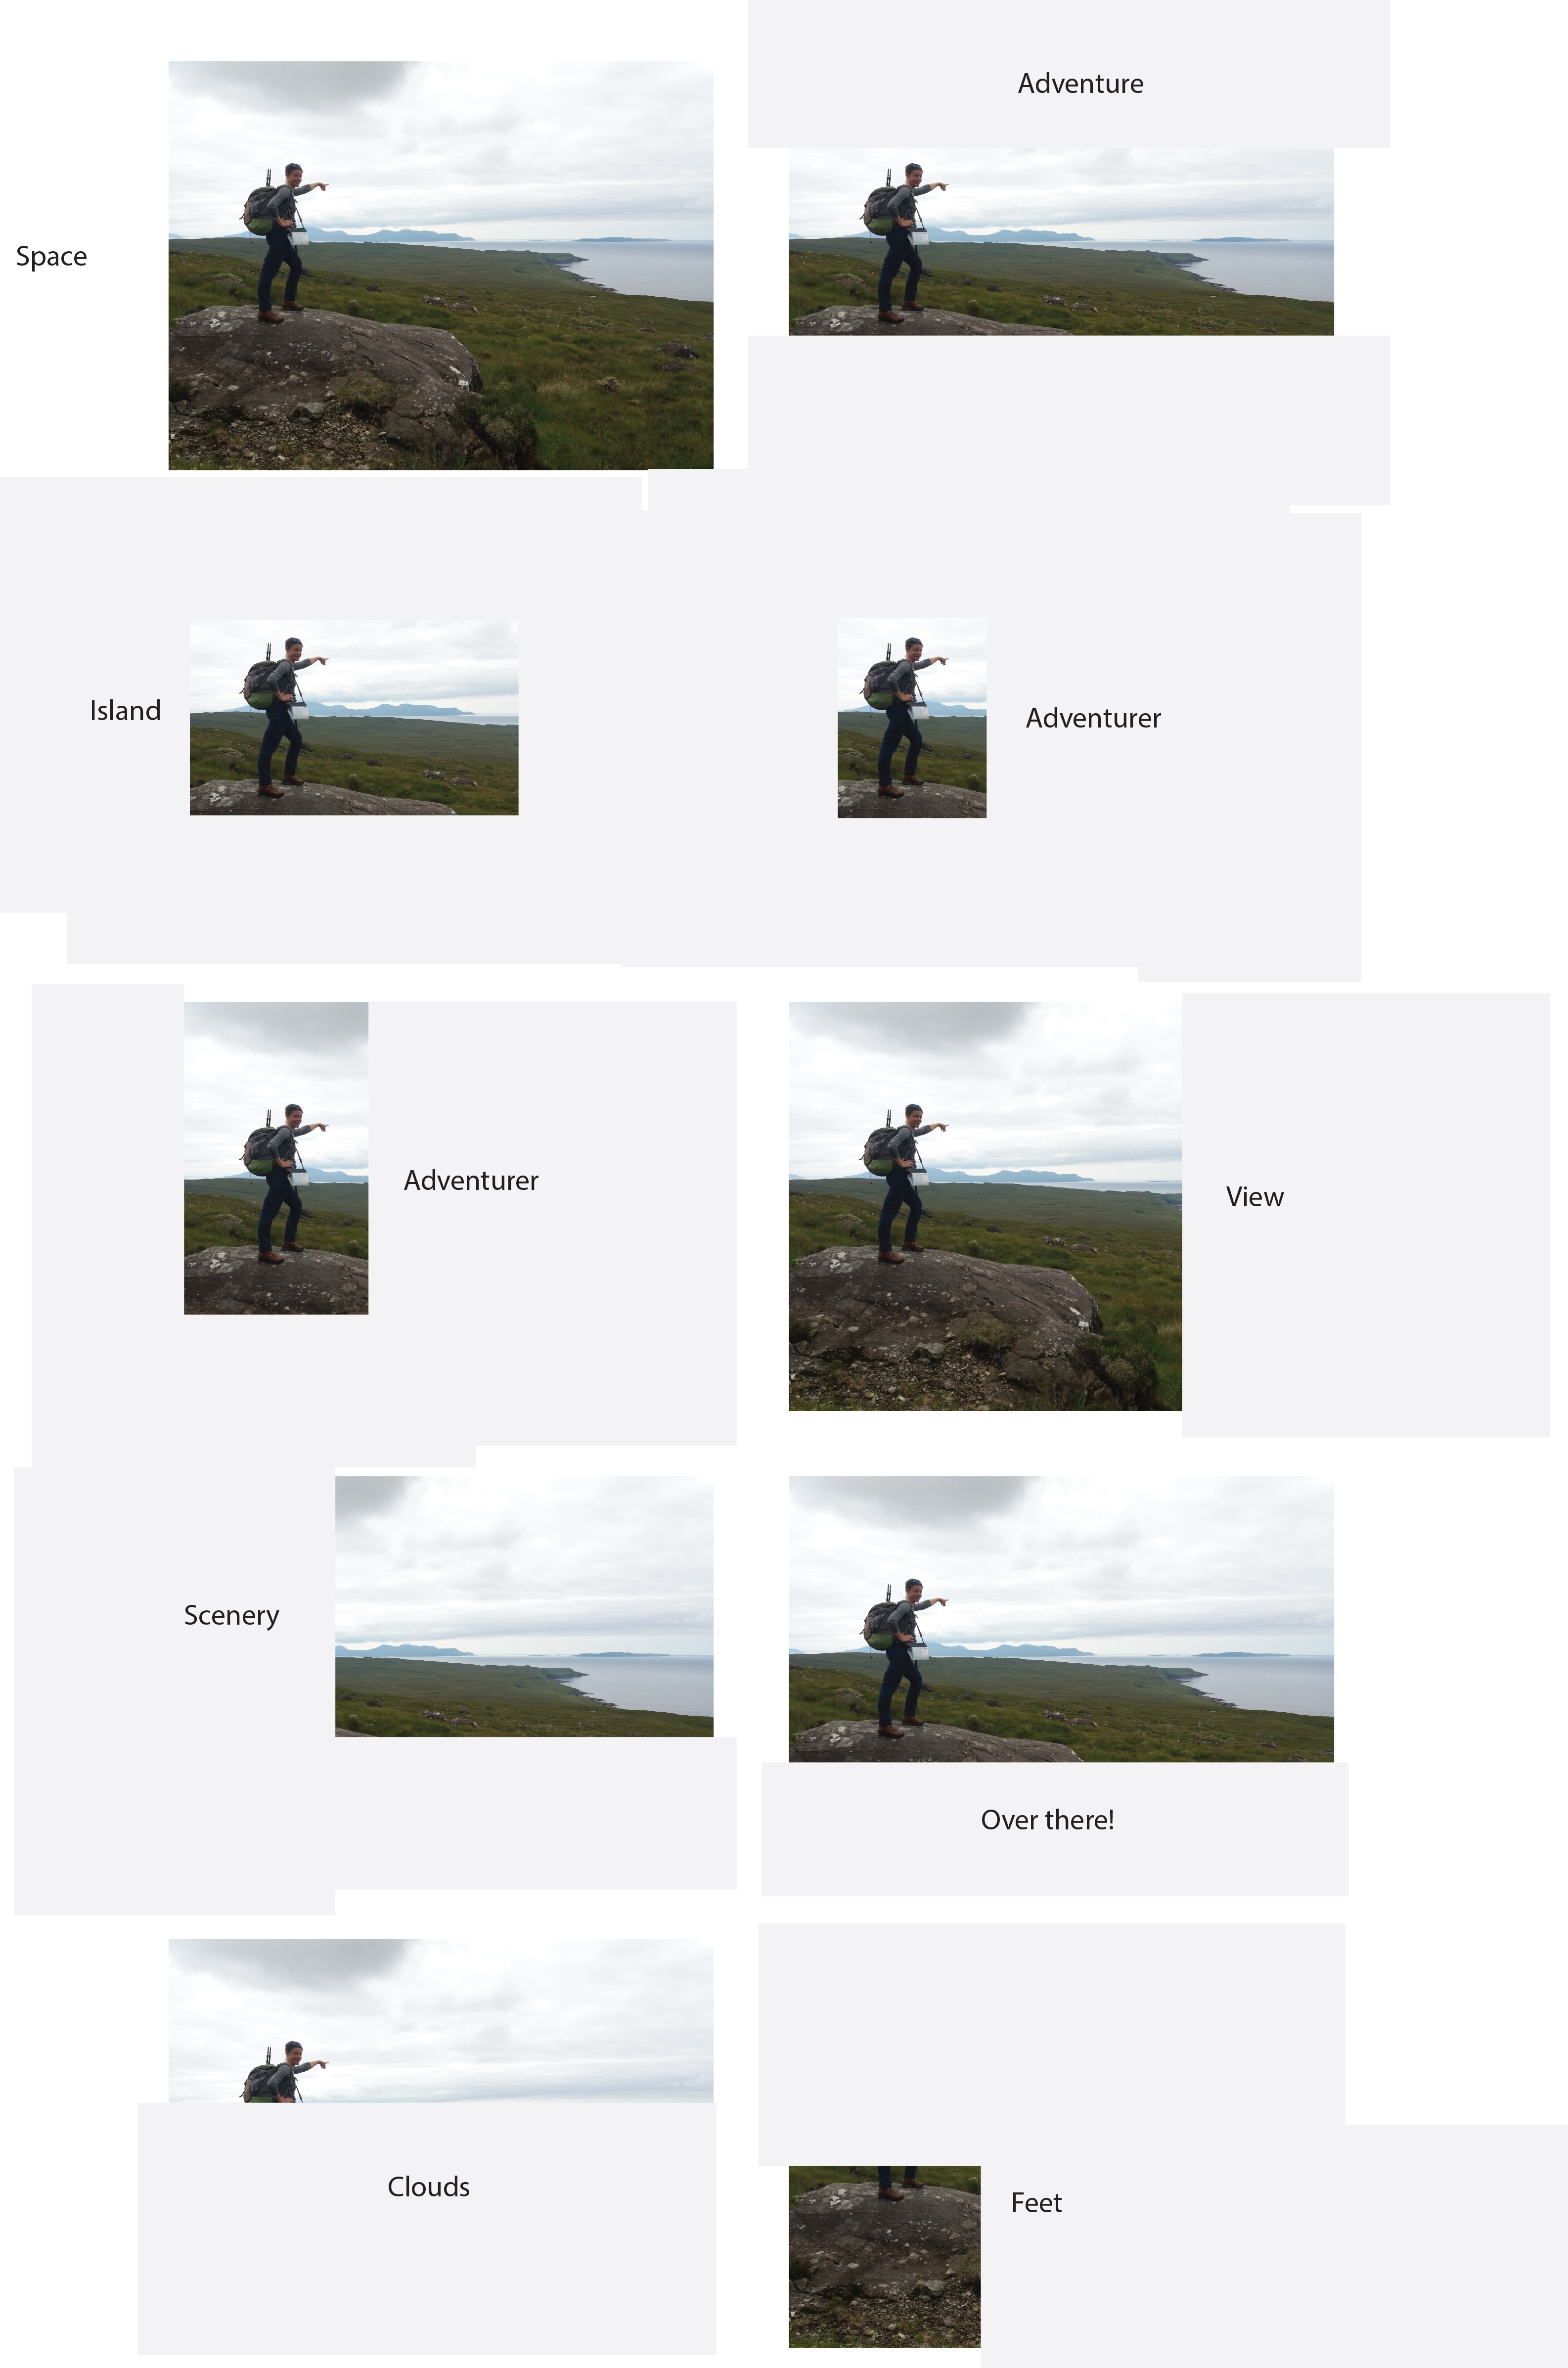
Next, I chose one of the images and developed it into a poster.
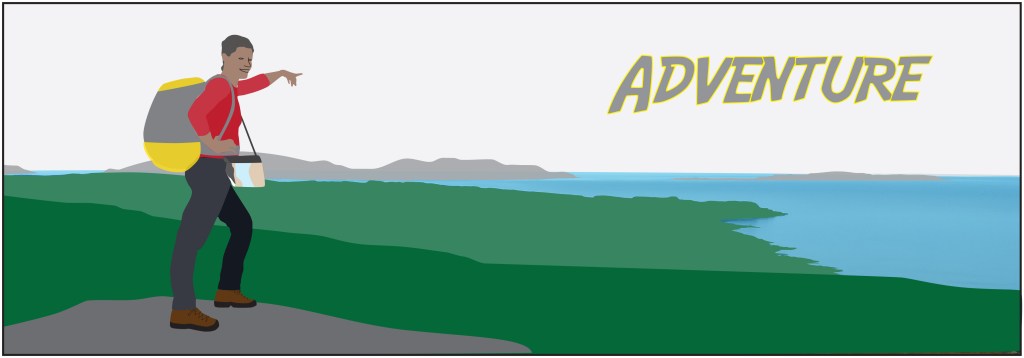
I think that I was a little too cheesy on my choice of font and should have gone with something plainer that fits the content of the image better. Otherwise I think that it’s quite an effective graphic image suitable for a poster. I had intended to use bold solid colours throughout the image. However, I like the different shades from the underlying photograph coming through from beneath the sea.
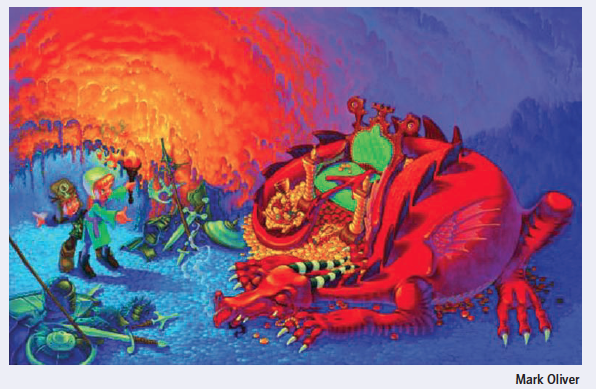
The aim of this exercise was to analyse the above image and answer guided questions about this image.
The key elements of this image are: a sleeping dragon; two children; treasure; and a cave. The image suggests that the two children have entered the cave, or dragons lair, they have found treasure, which maybe they want to take away, and they are trying not to wake the dragon who is potentially dangerous. This interpretation of the story being told in the image is heavily based on common themes in stories involving children and dragons.
In terms of colour palette, the image strongly contrasts hot reds, oranges and yellows, with cold blues and neutral greens. Tone is used to highlight areas of the image that are in bright torchlight, or else in the shadows. The dragon and the children are the characters in the story and thus important; they are bathed in light, highlighting their presence.
The aim of this exercise was to take three objects (a tree, a child and a building) convert them to greyscale and experiment with composition.
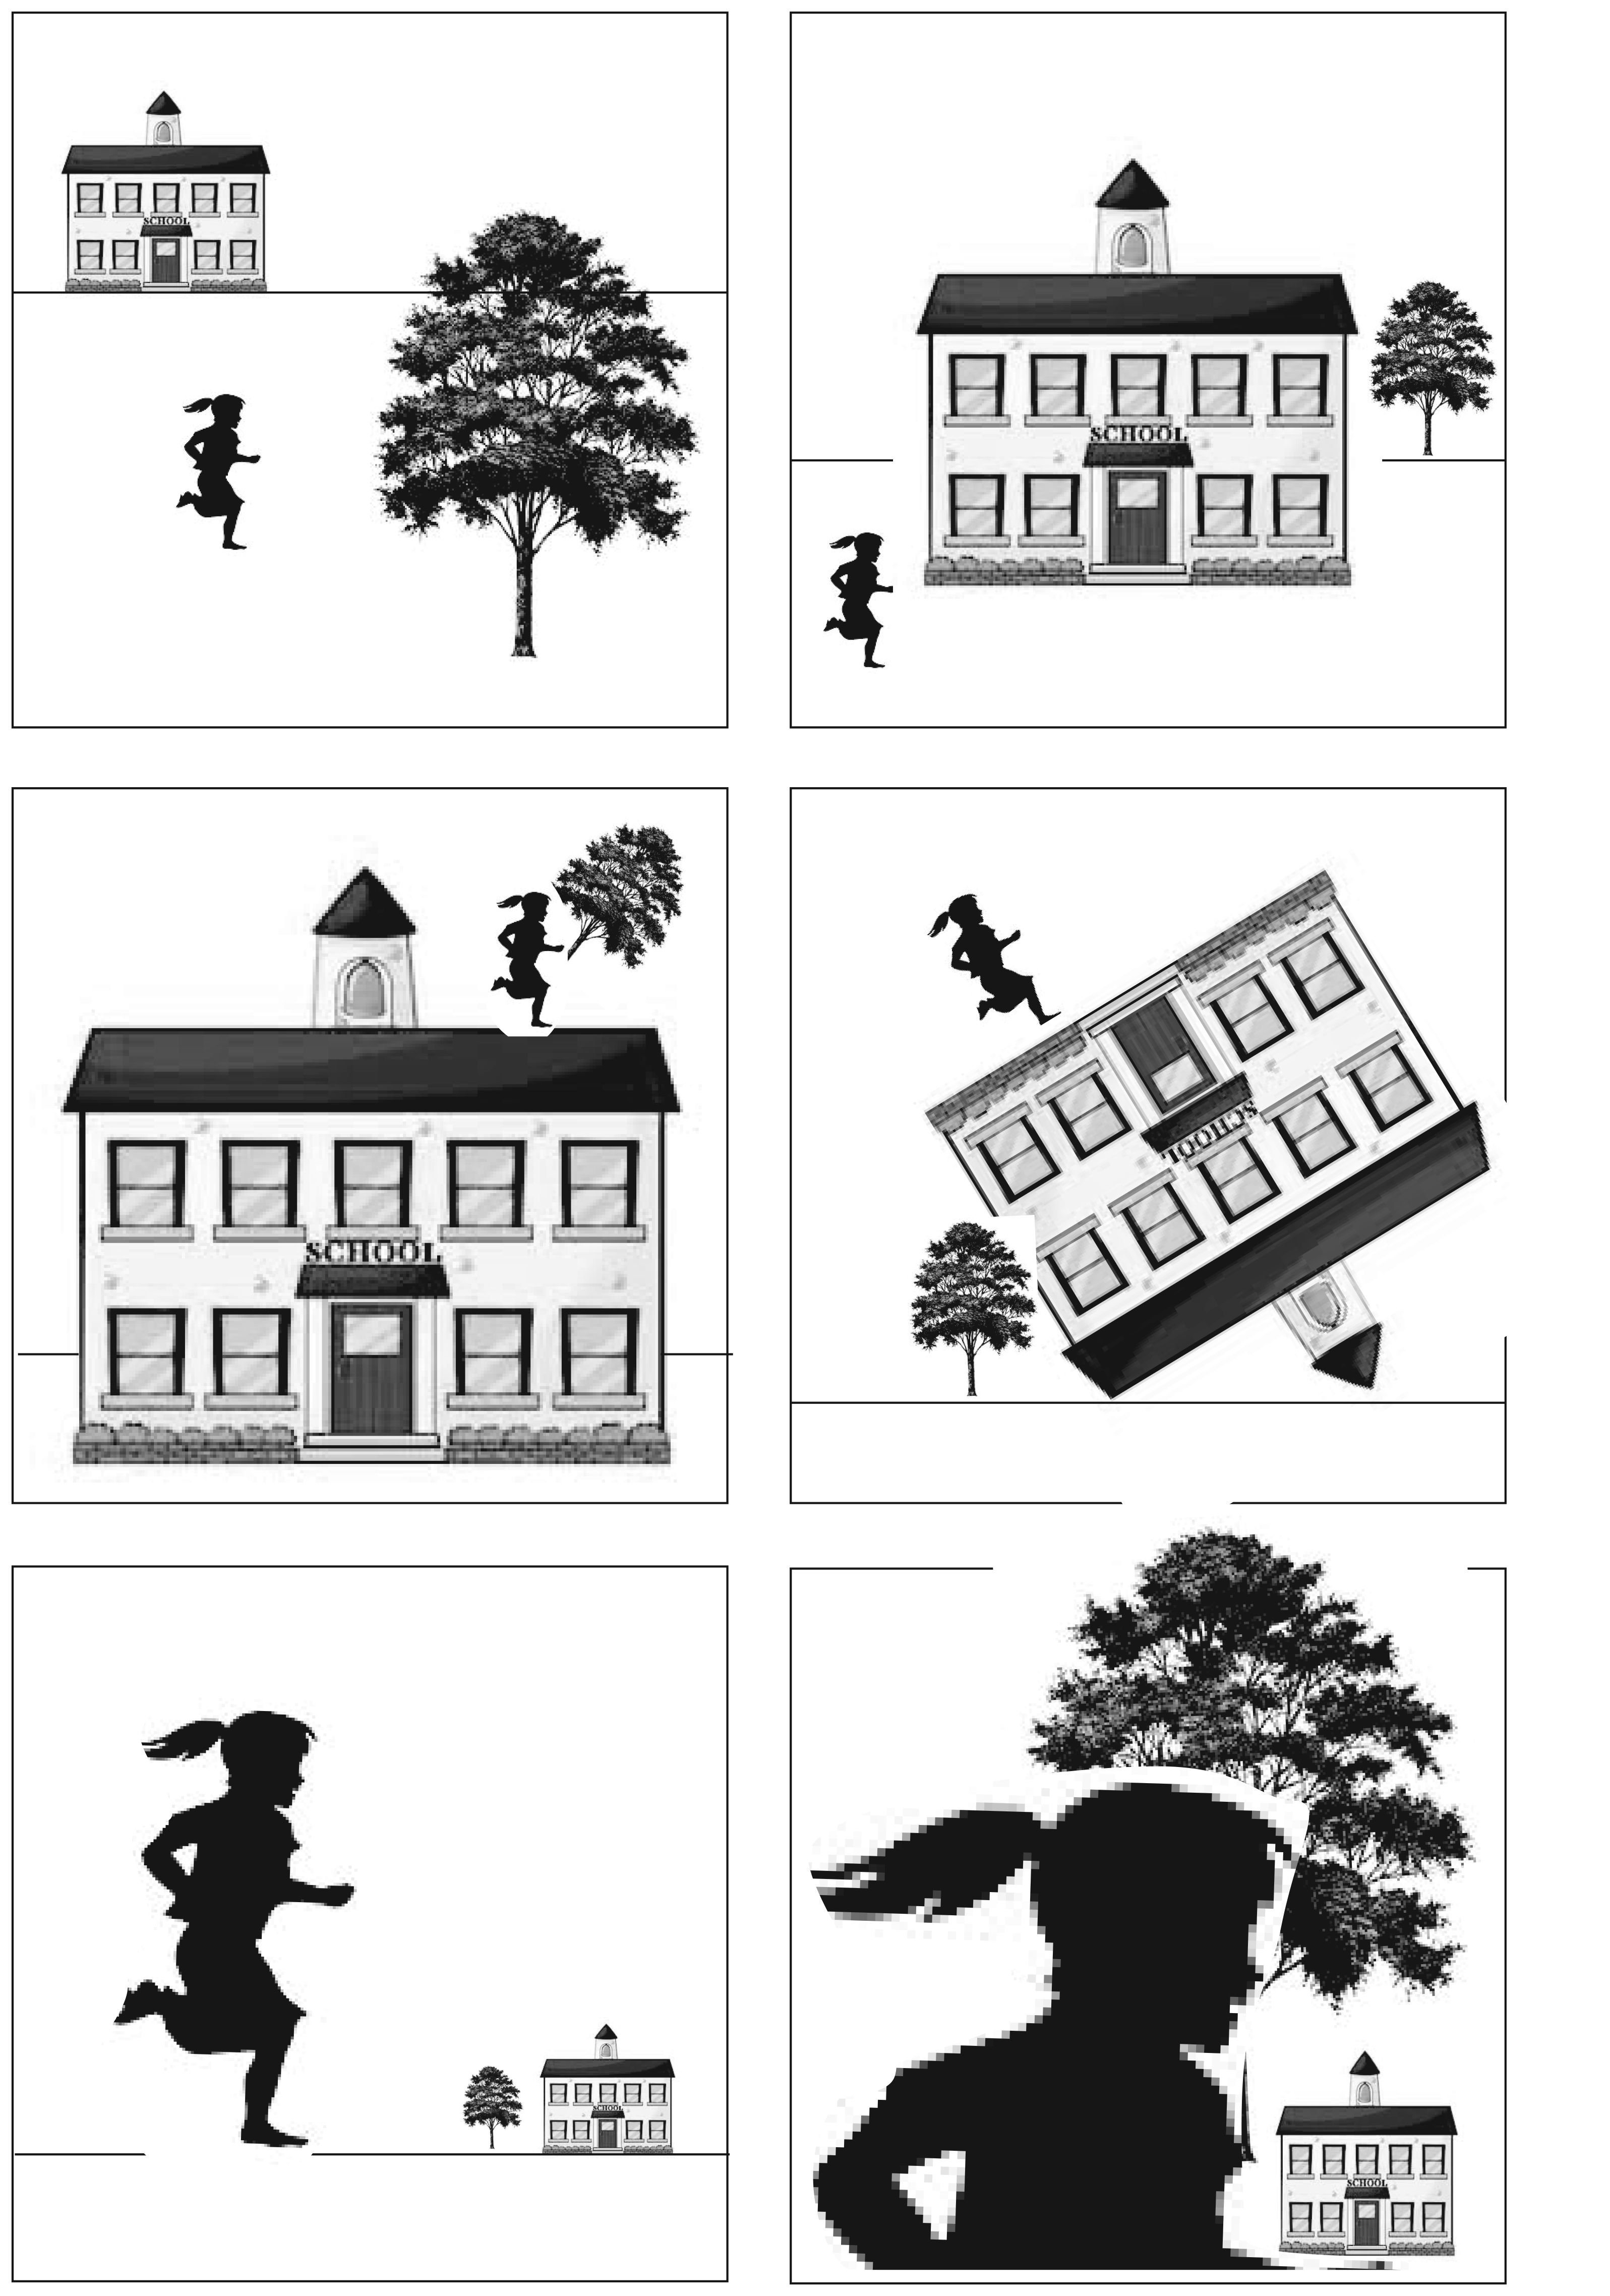
When the child is smaller than the house and tree then it makes the image look realistic – i.e. everything appears to scale. These images are quite boring; whereas I think that the images where the child is larger than the other elements are more interesting and more dynamic. In the case of the bottom left image, either the child is monstrously large, or the building and tree are toys.
When the elements of the image are aligned with the horizontal and vertical then it gives the image a feeling of order – everyting is where your brain expects it to be. When the elements are at angles to the frame rather than being aligned with the horizontal and vertical then this gives the image a feeling of chaos, or quirkiness. Things are not quite right, what has gone on to create that scene?
My favourite composition is the bottom left image where the child is large relative to the building and tree. I think that I find this image interesting because the figure, who is naturally the character in the image, is dominant. I like the possibilities of this image – what has happened to make the elements out of scale with one another?
